Pages

Friday, August 22, 2014

And the winner is....me!

I found a new thrift store nearby (yay!) and while meandering around, I found a shelf of trophies.  After the obvious moment of silence for all the kids who haven't realized their mom tossed their soccer/T-ball/gymnastics trophy yet, I realized it was a win for me.

So, I picked up a soccer trophy that was pretty hefty in weight.


I gave it a coat of white primer, and then picked a sunny yellow to top it off.


And now it serves as a great bookend for some DVDs in our kids' room.


I like the bright whimsical nature of it, while it still serves a purpose!

Wednesday, August 20, 2014

New House: Living Room

I have a grown-up living room!  Although it doesn't start out looking very grownup, I have big plans for this space.  No more asking guests to sit in juice stains and talk over the sound of Dora the Explorer (that's what the kids' room is for!)

Here's where our grown-up living room is starting out:


The problems include (obviously) the paint, but you can see I am already working ideas for that.  Additionally, we wanted to put a television on that blank wall, but we're torn.  There's no cable outlet there, so that will take some creative wiring/wireless projects.  And we aren't sure how much we would use a separate television.  Guests don't come over to watch TV, and when Jon and I watch, we just watch from the kids' room.

Projects include:

  • Paint
  • Furniture placement
  • Curtains
  • Art and Design
  • Using my mirrors - you know I love my mirror wall!
  • Some great lighting (no overhead lights)
  • Ceiling paint - low on the priority, but you can see the owners randomly painted a gloss patch on the ceiling - ignorant.
What are your thoughts??

Monday, August 18, 2014

Make-Me-Smile Monday!

Love that the kids are starting to play together!


New House: Laundry Room - Bling and Blue

Our sad little laundry room was a great place to add a big splash of color, so BLAMO!


Behold this amazing color - Acapulco Cliffs!  Closer up, you can check out the contrast, which I painted Ultra White by Valspar. (Both available at Lowe's).  Of course, after we started moving more things around I realized I already bought a quart of similarly colored blue paint for a failed bedroom redo.  But whatevs, I'll find something else to blue up.  I also rolled a layer of Ultra White by Behr on the side walls to make that blue really stand out.
Olympic's Acapulco Cliffs
Quite a big change from before...


And the bling you can find here:


I love digging through Anthropolgie's hardware and these glass bubble knobs were a perfect price ($8 each) and a nice, but not too crazy touch for the outside of the laundry doors.


Next up is adding the big detail to the wall, which I mentioned in my inspiration post.  I already bought the stencil - now to find the guts!

Total Cost: $16 for the knobs, $25 for the white paint (although I'll be using it elsewhere), $15 for the amazing blue paint.  Total thus far: $56.


Monday, August 11, 2014

Make-Me-Smile Monday!

Watermelon is kind of a big deal.  And eating it is more important than learning to count...


Friday, August 08, 2014

Hanging Herbs

I dig the idea of fresh herbs, but with a second story kitchen with no deck, we were facing a bit of a problem.  Then I realized I don't care about this rental house, so let's screw some holes in the railing!

All in all, a simple formula.  Three herbs and a planter...

Sage, Basil, and Spicy Basil awaiting their potting in this rectangle planter.

Plus one empty railing outside your kitchen sliding door....


Plus one hunk with a drill...


Equals one hanging planter...


Filled with plants!


Next is to make cute labels - what's the neatest way you've seen to label plants??

Wednesday, August 06, 2014

New House: Our Kitchen

Hey, it's time to check out where we are starting with the kitchen!  So, here's where we are starting:


Oh, so very much to hate.  Tired of that beige paint yet?  Yeah, me too.  Also, check out that sweet sweet pattern on the floor and those awesome green countertops.  Remind you of our kitchen two houses ago?

We meet again....the kitchen from our house in Springfield, VA
Of course, the crappy thing about being in a rental is that we can't change anything.  Where in Springfield, that hot mess from above eventually turned into this....


We can't remove the black appliances, get granite countertops, or put in flooring here.  (Well, Jon said we COULD put in flooring.  My ears perked up, and I think he regretted saying it).  But, I think it's safe to assume we are stuck to having to be creative.

The good news?  That amazing sliding door.  Although it leads to nowhere, it's great to open up.  Also, it's so open to the kids' room, and I love that it's really big.  AND, I don't hate those cabinets - they are kinda vintage/beachy looking.

Among the many downsides is the very limited counter and cabinet space and the ugly everything-but-the-cabinets.

Ideas:

  • Continue the paint from the kids' room.  It'll look great by the light cabinets, albeit horrible next to the counters.  Those counters look awful next to everything though, so no big deal.
  • Build a breakfast bar overlooking the big window.  
  • Add in a rolling island that we can push to the side to open it up, but roll to the middle when we need extra prep cooking space
  • Remind Jon he said we could put flooring over the vinyl that we would remove on our way out??
What do you think?  

Wednesday, July 30, 2014

New House: A Cool Kids Room

Obviously, my big complaint in all my house posts have been the fleshy beige that someone decided would make the house attractive.  It doesn't.  You've seen one of the living rooms that we are designating The Kids Room already, but here's a reminder of our starting position:


Well, fast forward a few weeks and we've done two major things: 1) Move in (please forgive the pile of toys as we figure out what stays and goes) and..drum roll....2) PAINT!


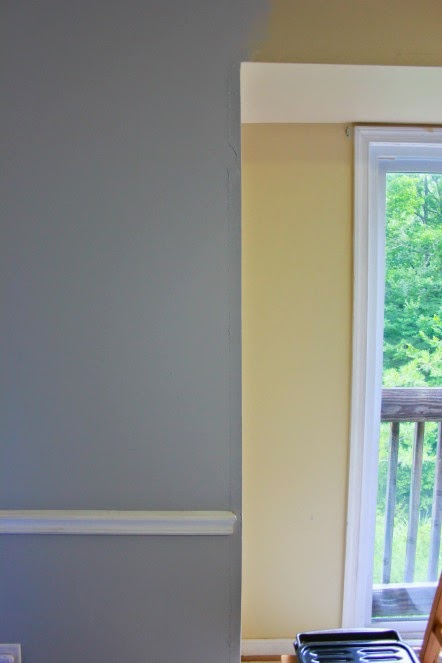
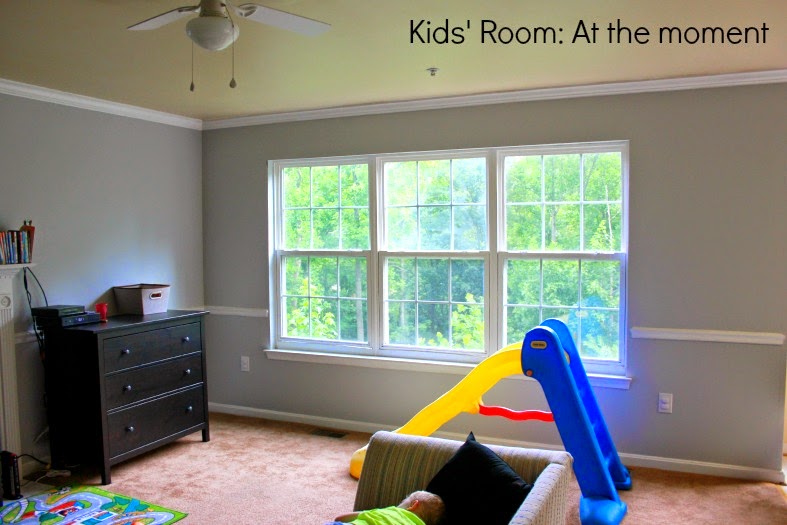
So, in addition to a bunch of furniture getting thrown in (more on that below) we got this great paint!  This color is called "Fine Silver" and I know it looks a lot like the "Thin Ice" we used in Avery's room, but what can I say?  I'm a sucker for Shades of Grey.  The colors, not the book, although feel free to read the most hilarious review of that horrible book HERE.

Now, forgive the messy room, but let me give you a quick tour of what we're dealing with.


First, you can see from the picture right above, this color is a BIG change from the beige.

The dressers are IKEA's Hemnes line and we also have two more upstairs.  Love em.  One here is for Cassidy's clothes and one is for Avery's.  We always just dress the kids down here where all the action is instead of hauling each of them BACK  upstairs periodically to get ready for the day.  So much easier.

We mounted our television up high to save room, but we still have a bit of space on the mantle for DVDs and the like.


The couch is currently a Goodwill find that Jon got in Alabama that the kids can jump/play/spill on.  I'd like to replace it with two big squishy chairs eventually to keep the room open more, but the couch is working at the moment.  Even though it's sitting directly on the floor cause we can't find the legs in all of our boxes downstairs.

The ceiling that didn't look so beige with beige walls now looks REALLY beige.  In face, the whole house has fleshy ceilings, but they are going to be a "Yeah, if we have time, it would be nice to repaint the ceilings" project.  More important things to do, so no one look up!


That slide was a $30 buy at a thrift store and has scored me Mom of the Year status.

The bench in front of the fireplace was from Home Depot that held books in our old house.  Now, we think it'll find a new home.  The plan is to block out the fireplace with wood or something that we've painted with chalkboard paint so the kids can have fun with that.  Maybe a big piece of metal painted with chalkboard paint so they can put magnets on as well, but Cassie still likes to put magnets in her mouth, so maybe just drawing is a good step.


So I hope you are all forgiving the mess.  Moving + kids is always a work in progress.  We are in the process of paring down all of those toys.

I love love love the change, although the color tends to look blue rather than grey.  Still, no complaints from me.  Wait until you see the color playing off my curtains that will frame that big window!!

Friday, July 25, 2014

Rock, Water, Kids

For a cheap $7, we picked up this clam shell sandbox/pool on a random trip to Walmart.


Though tiny, I knew my kids would have a great time splashing/throwing rocks at each other in the evenings.  Although meant for sand, I really despised the idea of kids covered in sand, sand in diapers, sand all over the house, etc.  Taking a hint from other blogs, I decided to use pea gravel.  True, it doesn't make castles, but my kids just want to dig and put rocks on each other's heads, so I thought it was just fine.


Three bags of this was under $12, so this project was going pretty well for me.  Now pea gravel is pretty dirty already, and I wanted to give it a good rinse to get what loose sandy materials off of it I could.  I didn't have a big rinsing container or giant colander, but I did have a shell pool!

First, I took a drill and put a ton of 3/16th holes in the bottom of what was going to end up being the rock side.


Not sure where this line across the photo comes in, but hopefully you can see all the holes
 Next, I dumped in two bags of rocks (that seemed to make it deep enough, and now I have some in reserve to replace all the ones that are being dumped on the ground) and then Avery helped me hose them all down while Dash pretended not to care.


Once the water was in we (well, really I because at this point, Avery had lost interest) pushed the rocks around in the water to loosen up any dirt.  I was please to see the water draining out of the holes in the bottom.


And, not that my kids waited for it all to dry, but it did eventually dry.  All that was left was to throw a bath mat in the pool side, fill er up, and let them go nuts.  And by "go nuts" I mean Avery gets naked and hides.


Here's the finished project - they love it, with our without the water part.  Our new favorite game is to manually transfer rocks from one part to another.  For less than $20, I can't complain!


Wednesday, July 23, 2014

New House: Basement

Our new house's basement is HUGE!  It's a big L shape that covers the entire house, and it's finished and has a full bath.  So, it's perfect for storage, a little workshop for Jon, AND a guest area.  And because our first guests were coming right as we moved in, this area became a priority.

Here's where we are starting:


So it's got a little nook (you can see in the second picture) where we'll probably put a bed, and the more open area you can see in the first picture might be nice for a table/chair/desk or something.  The problems are actually pretty minimal in that it's just empty (more shopping for me!)  The walls are in pretty decent shape and a nice neutral color (and not fleshy) so I'll probably just leave them alone.  Given that, my plan is:
  • find a few bright rugs
  • get some guest furniture
  • decorate the walls to break up the neutrality in there
I don't really have inspiration pictures because I have no idea what I want to do in here, other than bring in color and make it a really nice place for guests that doesn't feel too basement-ish.  That nice sliding door provides some great light, and if I can spruce up the garden area, it'll be a lovely sight.

Ideas?

Wednesday, July 16, 2014

New House: Avery's room - in the grey!

Two late afternoons in the new house and one very stretched-at-the-end gallon of paint, and we have a painted room!  Here's a closeup before and after:


This was really a four-day venture:
1) Spackle
2) Sand walls and prep
3) Paint cut-in areas and the corners
4) Roll the rest of the walls

I used a 2-inch angled brush for the cut-ins, which worked nicely, and used some blue painters tape on the top and bottom (I'm steady enough to paint around door trims without it) to get clean edges.  For paint, I used Olympic's "Thin Ice" in an eggshell primer + paint, which is this very lovely light grey color.  Really brightens up the room, I mean WOW!  Let's see the real befores and afters, shall we?


Sorry for the oddly shaped photos - I got a new phone between the befores and the afters, so the dimensions come out all different now.

I'm thrilled with the color and how much bigger and brighter the room looks now.  Just a few touchups to make and this room will be ready for the next phase!

Thin Ice, by Olympic
Total cost so far: $40 (from the post on the ceiling) + $32 (for tape and Thin Ice paint) = $72